Showing posts with label lace. Show all posts

8.15.2011

Deluxe Oblique

I love love love this sweater and I almost ruined it!
Deluxe Oblique
The Pattern: Oblique by Veronik Avery Raverly Project Page
Size: XS
The Yarn: Gedifra Shetland Deluxe in Med Brown (9293) 9 skeins (1143yds/1045.2m)
Needle size: US 7 and 9

Started: 1/26/11
Finished: 2/21/11

This sweater sucked up more yarn than was called for.
I only worked 2.5” of twisted rib on cuffs (I didn't do a reverse cuff as called for), my sleeves were still pretty long. I also eliminated rows 13-16 (36 sts remain unworked at each end of Row 12) of collar and then skipped to rows 17-20.
I still ended up using every last strand of yarn (a couple hundred more yards than specified) and then had to sew some of the seams with a different yarn.

Deluxe Oblique
I really hate sewing seams, I am just not good at it. But I wasn't sure I could figure out the shaping if I tried doing this in the round. So I sucked it up and knit everything in pieces :'(

Deluxe Oblique Closeup
This sweater turned out really well. I loved the fit and the yarn was soft and silky. Then I lost my mind and put it in the washing machine where is was viciously shrunk to 2/3 its size!
After several hundred gallons of tears and some elbow grease I managed to reblock it to the correct dimensions. Although the yarn has lost some of its silky softness *sniff, sniff* it still remains one of my favorite knits.

5.27.2010

Prairie Tunic and Focaccia Bread

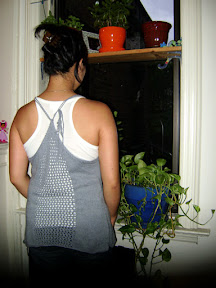
Prairie Tunic

The Pattern: Prairie Tunic by Veronik Avery Find the Pattern on Raverly
Size: 33
The Yarn: 2 1/2 skeins of Valley Yarns Sheffield in Mirage (545yd/498m)
Needle size: US6/4.0mm

Started: 4/14
Finished: 5/22

Prairie Tunic

I've been wanting to make this for 3 years now. Not sure what was stopping me. It is a great little top.

I am a bit unsure of what to wear under it. I've been experiementing with a couple tanks - one regular tank and one racerback.

Prairie TunicPrairie Tunic

The instructions tell you to knit this in two pieces, but I'm terrible at seaming. So I wanted to do this in one shot. So I cast on for both the front and back and joined to knit in the round. About 5 rows in I realized that there are supposed to be slits up the side - will I never learn to read a pattern before I start? So I frogged it tand started over.

This time I cast on the back piece and the front piece using two different balls of yarn, then knit two at a time (like with socks or sleeves or other things that come in pairs). Once they were 4" long I joined to knit in the round (the pattern calls for 6 inch slits, but that seemed really long to me). When joining make sure that you are on a RS row and that your work isn't twisted. I continued like this until I got to the the triangle shaping.

Then I knit the left triangle about 50 times. I had two problems.

One: When you get to the triangle decreases you also need to adjust where you start and end the lace panels. BUT the pattern doesn't say by how much. By looking at pics of finished Prairie Tunics on Ravelry I decided to eliminate one decrease and yarn over from the beginning and end of each panel on each third row.

Two: There was errata that I didn't know about. Note to self - always check for errata. The errata isn't much different than what's in the pattern already, it simply eliminates one of the decreases on the inner side of the triangle. Once I discovered the errata it went smoothly.

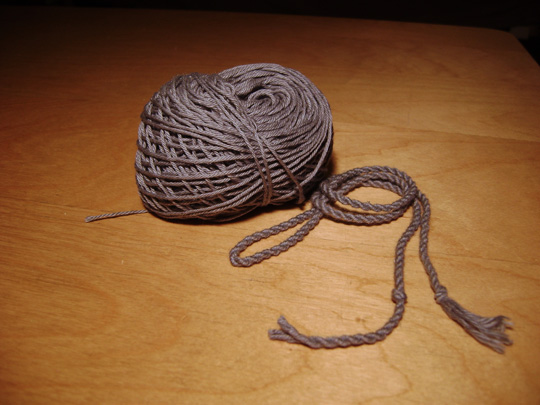
The twisted cord took me a while to get right. I kept dropping the ends when I was twisting. I finally tied loops in the ends and hooked them around my index fingers. Then I just rotated my wrist to get the cord to twist. I also stood to the side of the door knob that I had the other end looped around, rather than directly facing it. When I was facing it the end kept slipping over the knob.

Prairie Tunic

I have one glaring mistake. I messed up one of the lace repeats. Whoops! It's really obvious to me, but hopefully I'm the only one who notices.

Prairie Tunic Leftovers

The yarn was good. It is a cotton/silk mix, so there is a little bit of shine. No problems with splitting. I usually avoid plant based fibers, because I like the strechiness of animbal based fiber. But a cotton mix is good for light summer clothes like this. I used about 2 1/2 skeins, there was 22 grams of the 3rd skein left over.

Focaccia

I also made this really yummy focaccia bread. It is from the Bread Baker's Apprentice. It takes about 3 days to make, but it is so worth it.

Focaccia

It is great plain or dipped in marinara sauce.

4.29.2010

Clothilde & Pretzels

Another shawl completed for 10 shawls in 2010. I have actually been meaning to post this for a few weeks now, but I'm lazy. I finally got my butt in gear and retouched my photos. Of course retouching wouldn't be necessary if I just took better pics in the first place.

Pine Over Gold Clothilde


The Pattern: Clothilde by Kristen Hanley Cardozo Find the Pattern on Raverly
Size: neckline 64”/162cm; sides 33”/84cm; neck to tip 45”/114cm
The Yarn: One skein of Sundara Yarn Fingering Silky Merino in Pine over Gold
Needle size: US6/4mm and US10.5

Started: 1/23
Finished: 4/4

I'm really happy with how this turned out. The yarn is delicious. If I could afford to I'd use Sundara yarn all the time. Its soft and shiny and the colors are great.

Following Cattywampus's project notes I completed 4 repeats of the Gull Wing Lace and two repeats of the Spearhead Lace. I was a little bit afraid that I would run out of yarn. Cattywampus said she only had 12 grams left. I don't have a scale and have no idea what that really means in terms of yardage. But she had used the same yarn, so I put in a lifeline after finishing the Gull Wing Lace section in case I had to take out a repeat of something. The lifeline turned out to be a total lifesaver. I didn't run out of yarn, but I really messed up somewhere.

Pine Over Gold Clothilde

I'm still not sure what I did, the pattern was really easy to follow. But partway through my first Spearhead Lace repeat I noticed the sl-k2tog-psso's weren't matching up. I kept trying to fix the part that was screwed up but then it would mess up the next part. This led to much frustration and and angry muttering and I was forced to put clothilde away for a few days in order to preserve my sanity.

Pine Over Gold Clothilde

Luckily I'd put the lifeline in. This was my first time using a lifeline and it made it so much easier to fix my error. For those of you unfamiliar with lifelines check out the fixing mistakes section on knittinghlep.com.

I also made some soft pretzels.

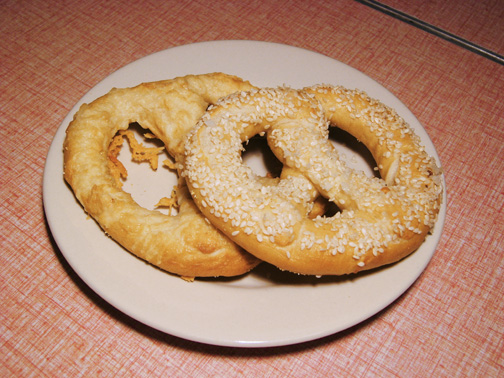
soft pretzels


I got this recipe from The Best of Cooking Light Everyday Favorites. I topped half with salt and sesame seeds and put asiago cheese on the other half. I prefered the asiago cheese topping. They were really good the first day, but weren't that great the next day. They got kinda tough. Anyone know how to solve that?

1.25.2010

Kureyon Dianna

Last month I joined the 10 shawls in 2010 group on Ravelry. The point of the group is to challenge yourself to make 10 shawls between the 1st of the year and the 31st of Dec. If you're interested the challenge rules are listed at the end of this post.

Kureyon Dianna closeup


The yarn was a clearance item I picked up at Knit New York almost a year ago. I really liked the colors but I had no idea what to do with it. In an effort to destash I've been using the pattern ideas tab on Rav. And that's how I discovered this pattern.

The Pattern: Dianna by MaweLucky/Jane Araujo Find the Pattern on Raverly
Size: 52" on the longest side, 36" on the short sides, about 28" from the center of the neck to the tip.
The Yarn: One skein of Noro Kureyon Sock in 164
Needle size: 7

Started: 1/4
Finished: 1/24
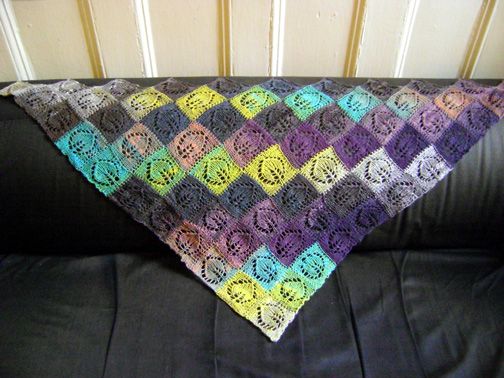
Kureyon Dianna

I had a lot of trouble starting out. The designer lists this disclaimer at the beginning of the pattern:
"This pattern is not intended for beginners and assumes you already know how to work entrelac. This document will not teach you how to do entrelac. If you want to learn this technique, Google is your friend."
However, the entrelac wasn't what gave me problems. It was the lack of instructions. This thread really helped me get going. There is helpful advice from the designer and others who've made the shawl and some good links.
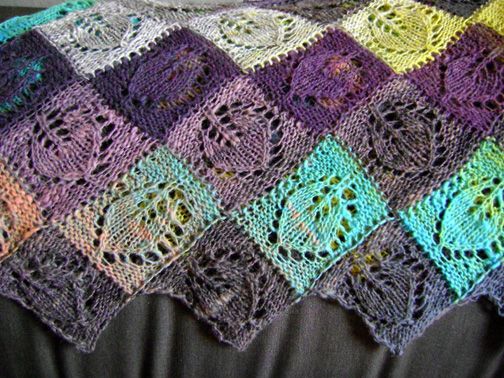
Kureyon Dianna edge

My problem was I had no idea what to do on the wrong side rows. The chart that is included in the PDF is blank for the WS rows and there are no written instructions either.

From the thread I discovered a chart with the WS rows included. But I still wasn't sure what to do on the wrong side, because the chart key simply lists the | symbol as knit stitches and the — symbol as purl stitches.
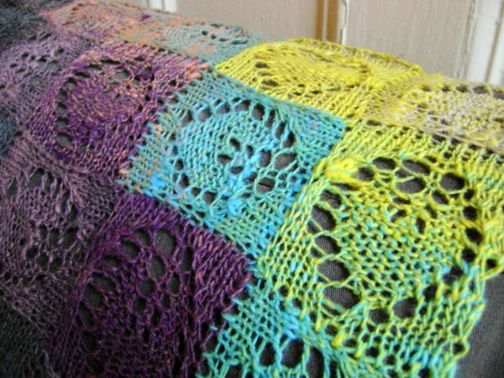
Kureyon Dianna backside
On wrong side — should be knit and | should be purled.

I guess that it is supposed to be obvious that the | on the RS are to be knit and the WS purled (and vice versa for the — symbol). What confused me was that it states the shawl is reversible. So to me that also could have meant that the shawl was garter stitch. In the end I looked at close ups of completed Dianna's to figure it out.
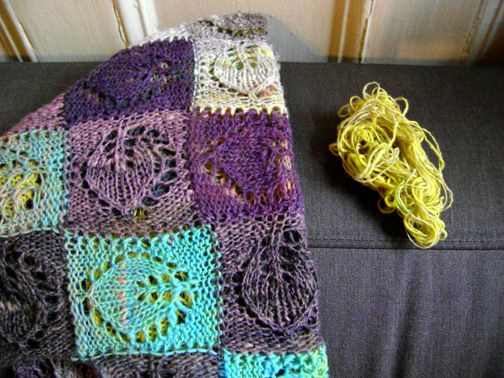
Kureyon Dianna and leftovers

I ended up with 11 tiers, using nearly the whole skein of yarn and with only a little blob of yellow left over. If I had more yarn I would have done triangles on the last tier to make the top/neckline of the shawl straight across rather than jagged.

10 shawls in 2010 challenge rules:
  1. Make 10 shawls between Jan. 1st and Dec. 31st 2010
  2. 2 shawls must be a minimum of 500 meters (546 yards). The remaining 8 must be at least 250 meters/273 yards
  3. NO WIPS count! Meaning anything that was started be for Jan. 1st 2010.
At the beginning of January 2011, a prize drawing will be held for everyone who has completed their 10 shawls. The prizes are provided by sponsors and so far include:
  • Gradiance Shawl Sets from Painty at Unique Sheep
  • Lace collection (set of 7 patterns) from Leen002
  • Choice of 1 of 3 patterns (My Valentine, Fleur-de-Lis, or Valentine Scarf) from ShuiKuen
  • 1 skein of lace-weight yarn from Fun Knits
There are also monthly prizes.

You can join the group here. So far there are over 2000 members and nearly 500 completed projects.

**Update 2-18-10**
Recieved a couple questions about this patttern, so I thought I’d post the answers here.

If the RS was facing I picked up knitwise (i think this was the even tiers) and if the WS was facing I did it purlwise (should be on odd tiers).

On the pick up row you are only picking up 12 sts. The following row you are working 13 (joining one stitch of the previous square without a decrease). So you actually don’t do a joining decrease until the 4th row.

1.11.2010

Elvira for Megan

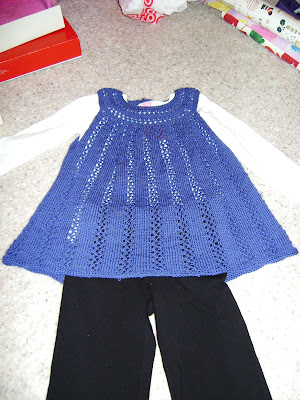
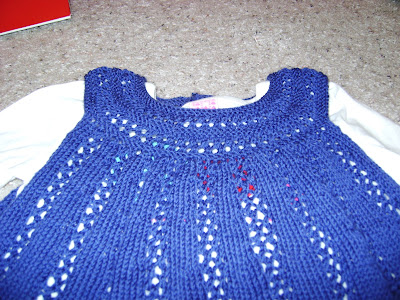
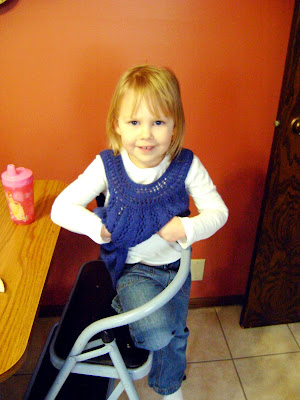
Elvira for Megan

The Pattern: Elvira by Sanne Bjerregaard Find the Pattern on Raverly
Size: 4
The Yarn: A little less than 3 balls of Sandnes Garn Lanett in 158
Needle size: 5

Started: 12/14
Finished: 12/23

I thought this was a fun item that could be worn year-round. All you have to do is switch out the long sleeves for something cooler.

Elvira for Megan

I had a couple issues with the pattern.
  1. I didn't like how the notation for the separate sizes was written. I'm used to having the alternate sizes written in parentheses. like this:
    sizes 1 (2, 4, 6/8, 10/12) then within the pattern it would say knit 3 (4, 5, 6, 7)
    Instead they were written like 1 (2) 4 (6/8) 10/12 and within the pattern like knit 3 (4) 5 (6) 7. The color makes it easy to follow, but all the added parentheses gets a little confusing.
  2. On the increase rows it doesn't tell you how many stitches you should end up with. Granted I could figure it out by counting how many increases per repeat and how many repeats per row, but my math isn't all that reliable and it gets rather time consuming considering how many increase rows there are. Stitch counts (at least at the end of every section) would've been a help.
Other than that I thought the pattern was great. I like the strips of eyelets and the lacy collar. And best of all it is one piece, no seaming required!

Elvira for Megan

I chose some clear, heart-shaped buttons to finish this off. They're hard to see in the pic. I should have taken a picture of them before attaching the the tunic. But I assure you they are cute.

Elvira for Megan

I followed the pattern's instructions for the length and this ends up hitting her below the bum, but not long enough to be a dress.

Learn from my mistakes:
  1. I didn't use smaller needles on the neckline as directed in the pattern, but I wish I had. The neckline fits her fine, but it is kinda stretchy so if she keeps tugging on it like in the pic its going to become a skirt. Using the smaller needles would have made the area tighter, perhaps preventing the neckline becoming a waistline.
  2. The back starts out as two sections to create the button flap area and then joined together after that. When I joined the sections I wasn't paying attention. I got a good 2 to 3 inches along before I realized that I had gotten one of the sides twisted and had to rip it back :'(
    Its one of those lines you always read in the pattern "join in the round making sure not to twist" and you think HA! I would never do that! And shamefully I did.
  3. Also don't recommend giving yourself less than 2 weeks to work on this. I was on a X-mas time crunch, otherwise I would never have pushed myself to get this done in that little time.