


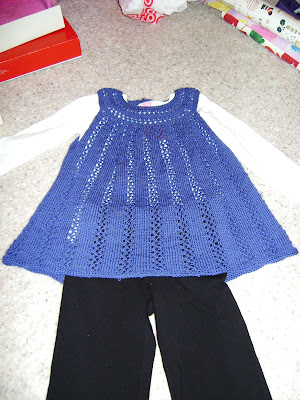
Size: 4
The Yarn: A little less than 3 balls of Sandnes Garn Lanett in 158
Needle size: 5
Started: 12/14
Finished: 12/23
I thought this was a fun item that could be worn year-round. All you have to do is switch out the long sleeves for something cooler.
- I didn't like how the notation for the separate sizes was written. I'm used to having the alternate sizes written in parentheses. like this:
sizes 1 (2, 4, 6/8, 10/12) then within the pattern it would say knit 3 (4, 5, 6, 7)
Instead they were written like 1 (2) 4 (6/8) 10/12 and within the pattern like knit 3 (4) 5 (6) 7. The color makes it easy to follow, but all the added parentheses gets a little confusing. - On the increase rows it doesn't tell you how many stitches you should end up with. Granted I could figure it out by counting how many increases per repeat and how many repeats per row, but my math isn't all that reliable and it gets rather time consuming considering how many increase rows there are. Stitch counts (at least at the end of every section) would've been a help.

Learn from my mistakes:
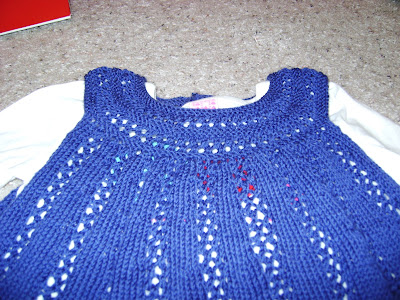
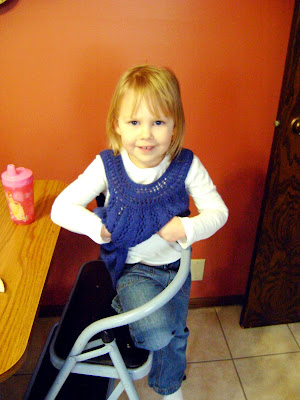
- I didn't use smaller needles on the neckline as directed in the pattern, but I wish I had. The neckline fits her fine, but it is kinda stretchy so if she keeps tugging on it like in the pic its going to become a skirt. Using the smaller needles would have made the area tighter, perhaps preventing the neckline becoming a waistline.
- The back starts out as two sections to create the button flap area and then joined together after that. When I joined the sections I wasn't paying attention. I got a good 2 to 3 inches along before I realized that I had gotten one of the sides twisted and had to rip it back :'(
Its one of those lines you always read in the pattern "join in the round making sure not to twist" and you think HA! I would never do that! And shamefully I did. - Also don't recommend giving yourself less than 2 weeks to work on this. I was on a X-mas time crunch, otherwise I would never have pushed myself to get this done in that little time.
No comments:
Post a Comment