3.30.2009

$19.99 Winders and Blocking Accessories!

Knitpicks has started selling ball winders, blocking mats, and lace blocking wires for $19.99.

Knitpicks $19.99


The reviews on Ravelry about the ball winder seem ok. Some people were having trouble with the yarn getting tangled on the base, but it seems that they weren't extending the metal arm that the yarn feeds through (I made the same mistake with my winder from JoAnn's).

Winder with arm in
This is what happens when the metal arm is folded in.

Winder with arm out
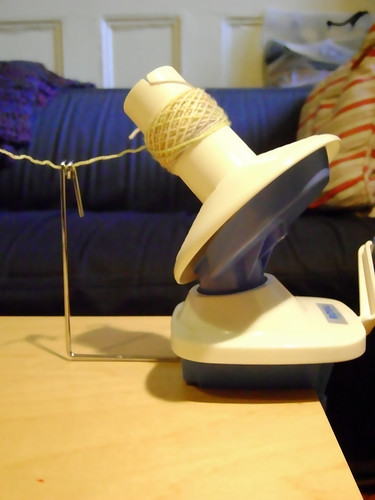
In order to get the yarn to wind properly the metal arm should be extended out like this.


If you've never used a ball winder before KP has a helpful video:


They say you have to use a swift if you are winding a hank, but I don't. I just wrap it around my knees while in a seated position.

Knee swift

Using a swift would definately be better, but if you have a tight budget (like me) knees work well.

I would love to get the blocking mats, because they are so white and pretty. But I already have somes, **sigh**.

KMart ABC Foam Mats


Mine are from KMart. I got them during the holiday season for $5 a pack and they work great. I can reconfigure them to fit the project I'm blocking and break them down to store them when not in use.

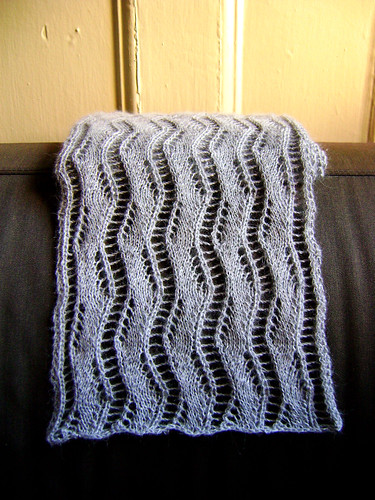
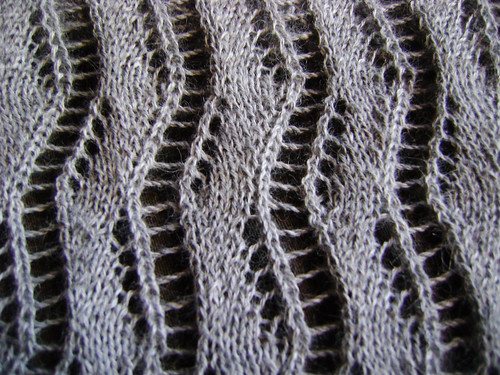
I do plan to get some of those lace blocking wires. Blocking wires can make blocking lace a lot easier and creates straighter edges on your lace projects.
If you don't have 20 bucks to spend on blocking wires I read that you can use welding rods:
"Since I find this site so helpful to me with my projects, I’d like to give back and share a very money saving tip as alternatives to lace blocking wires which, if ordered from a yarn source, can cost alot of money: You need to go to your local hardware store or a welding supply store and simply tell the nice man there that you want ”welding rods for tig welding, the size of a strand of spaghetti.” They come in 3 feet lengths, I bought six of them for a little over $4.00. More money for yarn :) They are stainless steel, make sure they are uncoated (I guess some of them come coated with something). Honestly, there’s no excuse for not wire blocking with a deal like that!!! Have fun, enjoy. If you are already familiar with blocking wires, they work every bit as nice as those “expensive” ones. :)"

-prairiesu on Ravelry


I'm a little too intimidated by the thought of picking out welding rods. So I'm gonna spend the extra bucks and get KP wires.

Warning! The following pics don't have anything to do with winders, blocking accessories, knitpicks or knitting. They're of my baby niece, so if you don't like babies stop scrolling!

Anna with Teeth

But how could you not like babies? Especially one as cute as this!

Anna with Teeth

Hahahaha, what an expression!

3.26.2009

Handmade Memories

Last weekend J and I went to see Yeondoo Jung's Handmade Memories at the Tina Kim Gallery in Chelsea. The handmade aspect and the Korean origin piqued my interest in going to this show.

Barley Field, 2008

Jung interviewed six elderly Koreans he randomly met in parks around Seoul. Each interviewee answers the question 'What is the most memorable experience of your life?'
The work explores the minds of people who lived through the Japanese occupation of Korea (1910 – 1945) and the Korean War (1950 – 1953) and is a continuation of the artists investigation of the 'subjective instability of memory as well as the tenuous authenticity of mechanically-produced images'.

Barley Field, 2008

The installation was made up of three pairs of large flat screen TV's. One TV would air the interview, while the second TV aired the staged recreation of the memory being described.

Legend and Poverty, 2008

Often times in the beginning we weren't sure how the two images were connected. As the video progressed our minds would slowly develop a connection between the scene being constructed and the story being told by the interviewee.

If you're interested in going, you better hurry. The show ends this Satuday (March 28th).

Handmade Memories by Yeondoo Jung
Tina Kim Gallery
Chelsea Arts Tower
545 W.25th Street, 3rd Floor
212.716.1100
Open Tues. – Sat. 10 am – 6 pm

3.25.2009

Head Gear for Baby

I have yet to master teeny tiny socks and booties, so when a friend or family member is expecting I've been making hats.

Vine Lace Baby Hat

Pattern: 'Vine Lace Baby Hat' by Sandy Wiseheart Find Pattern on Raverly
Yarn: Misti Alpaca Sport in Black and Ivory and Reynolds Wash Day Wool in Red - less than half a ball of each.
Needles: US 3 DPNs

This is one of my favorite gifts to knit. It looks like it takes a lot of skill and time, but it is really really really easy. I've made this hat at least 4 times and each time the recipient(s) opened it they were thoroughly impressed. In fact upon hearing that it was a handknit one couple's looks of shock were so pronounced they could have been characters in a cartoon, jaws hanging on the floor.

One of these hats could easily be whipped up in a day. I've used a couple types of yarn. I really like how the alpaca turned out, because the fiber looks so soft and perfect for babies.

Reynold's Wash Day Wool

The other yarn I used is Reynold's Wash Day Wool. Sorry no pics of the hat, I blanked out and forgot to take any before giving it away. The Wash Day Wool is a superwash, so pretty hassle free for new mommies. But it doesn't have the soft, delicate look of the alpaca.

Here's another pattern I've knit for newcomers:

Umbilical Cord Hat

Pattern: 'Umbilical Cord Hat' by Jennifer L. Jones published in Stitch and Bitch Find Pattern on Raverly
Yarn: Plymouth Jeannee in Pale Brick - less than half a ball. Plymouth Jeannee in Lilac - a scrap will do.
Needles: US 7 24" Circ.

Started: February 10
Finished: February 11

This was another easy knit. I used some yarn left over from my Duck Soup sweaters.

Umbilical Cord Hat

I made a couple modifications. I shortened the i-cord on top and the body of the hat looked too plain, so I added an 'e' (for Elise).

Umbilical Cord Hat modeled by Elise

I attempted to crochet embroider the letter, but I didn't actually know what I was doing or bother to look up instructions. So I'm pretty sure I didn't correctly perform the technique.
Oh and I totally winged the letter form. Regardless of my inept embroidery skills it still turned out well.

3.23.2009

Creepy Cute

I love things that are creepy and cute at the same time.

Like these figurines:

Monster by etsy seller mmmbiscuits


Bruce the Bunny from loopyboopy


I also love things that are versatile. The above figurines were created from polymer clay, a medium with numerous uses.

you could make custom buttons for all your knitting projects:

Wood grain buttons from etsy seller blarneyyarn


you could make cute little stitch markers in any shape you want.:

Rubber Ducky stitch markers from etsy seller weeones


Or you could make accessories for your Amigurumi:

Indian Jones amigurumi and accessories from etsy seller GeekCentralStation


Accessories for Link (from Legends of Zelda) as seen on Geek Central's blog


Wow Geek Central really pays attention to the details. Makes me want a custom doll with jewelry, headresses, and/or weapons!

For resources and information about polymer clay check out:
Skygrazer's Polymer Clay Link Index
About.com Getting Started: Polymer Clay

3.18.2009

Lace Ribbon

Lace Ribbon Scarf

Pattern: 'Lace Ribbon Scarf' by Veronik Avery Find Pattern on Raverly
Yarn: Knit Picks Alpaca Cloud in Smoker, 2 skeins
Needles: Knit Pick Circ US 4

Started: January 10
Finished: March 18

Lace Ribbon Scarf

The yarn I used is a lace weight, so I held it double stranded. I just kept knitting until I ran out of yarn. With scarves I'm usually not concerned about the exact measurements. The final measurements of this are smaller than the pattern, about 8.5" by 72".

Lace Ribbon Scarf Close up

The only problem I had was it felt like it would never end, but it was worth it. I'm in love with how it turned out. The pattern, the color, love it. I wore it yesterday and kept walking with my head down because I couldn't stop staring at it :)
The lace pattern is beautiful and the Alpaca Cloud really shows it off.

3.16.2009

New tool

I am constantly peeling post-it notes off their pads and applying them to my knitting charts. It helps me keep track of which line I'm on (counting challenged me need all the help she can get). The only problem with post-it is that I can't see the previous line. So in order to tell if my stitches are matching up with the previous row I have to stop, peel back the post-it and peek underneath.

The solution? Highlighter tape

Highlighter Tape

Some ladies from the Sit N Knit group introduced me to this wonder. I can place a piece underneath the row I'm currently working on and still see the preceding rows.

Lace Ribbon Scarf with Highlighter Tape

And best of all it's removable! So I can stick one piece down, pull it off and move it up a row when I'm ready to move on.

Inga Hat with Highlighter Tape

Highlight tape where have you been all my life?

There are a lot of suppliers out there, but I got mine at Avid Aviator. 3 rolls for $6.50. With only $3 shipping it seems like the best deal.

3.15.2009

Fashioning Felt at Cooper Hewitt

Cooper Hewitt Exterior

I hiked it up to the Cooper Hewitt National Design Museum yesterday to see the Fashioning Felt exhibit.

There were some pretty interesting and beautiful pieces. Of course they displayed the usual clothing, furniture, bowls, and the ever popular felt rocks.

Molo Felted Rocks


I love this picture of Christien Meindertsma making her Flocks Pouf

Christien Meindertsma Flocks Pouf

Look at the size of those needles!

My favorite pieces were the more unusual installations:

Faucet with felt water

Felted Water
Sorry I didn't catch the name of the artist
Created by Janice Arnold. See below for some great comments from the artist!


Janice Arnold's Palace Yurt

Palace Yurt by Janice Arnold West Entrance
West entrance to the conservatory


Palace Yurt by Janice Arnold ceiling
Conservatory ceiling


Palace Yurt by Janice Arnold North Exit
North exit


The Palace Yurt is a really spectacular installation located in the museum's conservatory. Janice Arnold was inspired by the conservatory's structural similarity to a yurt. She details the design process further on the Cooper Hewitt blog. There are also pictures of the construction process on her website. If I had a conservatory, sunroom, or any room with a lot of windows I'd love to drape it in JA's creation. The material and soft light create a very relaxing cocoon.

The Fashioning Felt exhibit will be on display until September 7th.

Cooper Hewitt is open Mon–Fri 10–5, Sat 10-6, and Sun 12-6.
Regular admission is $15 or $10 for students and senior citizens; children under 12 are admitted free.
The Museum is located on 91st btwn Central park and Madison Ave.

If you can wait to go until May or June the garden will be open. Or even better you could just go again :)

3.12.2009

Multi-Section Case-Binding

Multi-Section Case-Binding

For the Winter Solstice Yoga swap Find the Group on Raverly I decided to try my hand at multi-section case-binding.

Multi-Section Case-Binding

What is multi-section case-binding?
The multi-section binding is the king of binding structures and is one of the most recognizable. Its sewn and glued structure is strong and durable, making it suitable for binding an important book that needs to stand the test of time.

-Heather Weston


So basically it is the method most commonly used to construct hard cover books and journals.

Exposed Spines


To make my journals I used a combination of the instructions in Heather Weston's Bookcraft and a tutorial from Curiously Craft Blog.

Bookbinding supplies


Bookbinding supplies are available at your local art store. I bought most of mine from Utrecht. Another place to go is Talas. A bookbinding supply store I've been dying to go to, but unfortunately they have rather limited hours; 9-5:30 M-F (I'm usually at work then).

Bookbinding supplies


I got my paper and cardstock at Paper Presentation, which also had a number basic bookbinding supplies. I used the above flecked paper for the book block aka the pages.

Endpapers


I used a few different kinds of 80lb. cardstock for the endpapers.

Endpaper - French paper


I really liked the effect of this french paper, because it is patterned on both sides.

Fabric


My fabric came from B&J Fabrics in midtown. I bought 3 different types:
Cotton shirting - the darker violet. I don't recommend using this. The fabric was too thin, so the glue bled through. I found a way to avoid the bleeding but it was a hassle.
Cotton twill - the lighter violet. Worked out ok but I preferred using...
Cotton Canvas - the damask print. It was the thickest, which I was actually concerned about. But it ended up being the easiest of the 3 to work with.


Check out TJ Bookarts to find more resources on bookbinding - that's how I found the Curiously Craft Blog

3.10.2009

Promenade Duo

So awhile ago I knit Mimi Hill's Promenade Scarf

Promenade Scarf


I liked it so much I decided I needed a hat to go with it.

Promenade Hat


Here's what I did for the scarf

Pattern: 'Promenade Scarf' by Mimi Hill Find Pattern on Raverly

Yarn: Brown Sheep Lambs's Pride Bulky
Needles: Knit Pick Circ US 10

Started: January 22
Finished: January 28

Promenade Scarf


Since I was using a bulkier yarn I only cast on 89 stitches and eliminated 4 rows (one set of the cable pattern).
I used the Norwegian long tail cast-on (from Favorite Socks) and a dbl crochet bind off (from knittinghelp.com).
I also only cast off 2 sts for the button holes, because 5 sts seemed too big for the buttons I used.
The finished size ended up about 23” x 6” and fits well.

Here's how I made the hat

Pattern: My own based off of the scarf pattern from above Find on Raverly

Yarn: Brown Sheep Lambs's Pride Bulky
Needles: Knit Pick Circ US 9 and US 10

Started: February 22
Finished: February 28

Promenade Hat


I determined that I should do 9 repeats of the 8 stitch pattern by wrapping my finished scarf around my head. Then starting with the smaller needles I cast on 72 stitches and joined to work in the round.
For 5 rows I did a 1x1 rib. Then I switched to the larger needles.
I followed the cable pattern until the hat measured approx. 6 inches.
I repeated rows 1 and 2 of the cable pattern one more time, then I started decreasing:

Promenade Hat


Row 1: K1, k2tog, k1, ssk, k1, p1 and repeated to the end.
Row 2:I K5, p1 to end
Row 3: Cn1 hold to back, k1, k1 from cn, cn1 hold to front, k1, k1 from cn, p1 repeat to end
Row 4-6: repeat row 2
Row 7: repeat row 3

Row 8: repeat row 2
Row 9: K2tog, k1, ssk, p1 to end.
Row 10-12: K3, p1 to end
Row 13: K3tog, p1 to end.
Row 14: K1, p1 to end. Break yarn leaving tail.
With tapestry needle thread tail through remaining loops and pull tight. Weave in ends. Block.

Happy knitting.