Showing posts with label my nieces. Show all posts

7.25.2011

Heads and Hands

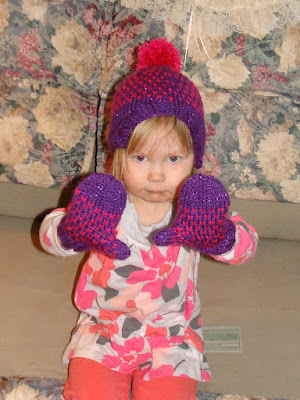
I had a lot of time off in Dec and Jan so I made hat and mitten sets for Megan and Anna.
Ear Cozies and Mittens
The Hat Pattern: Ear Cozies (CH-34) by Bev Galeskas
Hat Sizes: Large for Megan Raverly Project Page and Medium for Anna Raverly Project Page

The Mitten Pattern: Kathy's Mittens by Chris de Longpré
Mitten Sizes: Preschool for Megan Raverly Project Page and Toddler for Anna Raverly Project Page

The Yarn: 1 skein of Lion Brand Vanna's Choice Baby in Berrylicious and 1 skein each of Caron Simply Soft Party Black Sparkle and Purple Sparkle
Needle size: US 9

Started: 1/5/11
Finished: 1/14/11

I really like the ear cozie pattern. It has two versions the pointed and rounded. I made the pointed for Anna in the past, so I used the rounded this time and added pom poms.
Anna's Ear Cozie and Mittens
I wanted the sets to be similar, but not identical. So for the body of Anna's mittens and hat I used a polka dot pattern.
Anna has the hat on backwards in this picture. When it is turned around the cozies fit over her ears better.

Anna's Ear Cozie and Mittens
Then for Megan I did stripes. Hmmm Megan has her hat on backwards too, I can see the seam O_o
The mitten pattern was relatively easy to follow. The only modification I made was lengthening the cuffs.

7.18.2011

Christmas Cardigans

The nieces and nephew recieved cardigans this past Christmas

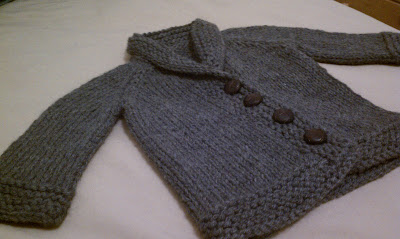
This is Wes (4mo.) in his old man sweater. I love this picture, he looks like such a little gentleman.
Wes in Baby Sophisticate
The Pattern: Baby Sophisticate by Linden Down Raverly Project Page
Size: 6-12 mo.
The Yarn: Berroco Vintage™ Chunky 1 3/4 skeins of Crackled Pepper 6107 (227.5yds/208m)
Needle size: US 8 or 9, sorry I forgot :'(

Started: 11/23/10
Finished: 11/30/10

Wes's Baby Sophisticate
This is a very easy to follow pattern and I love the shawl collar. I also really liked the yarn, it was nice and soft.

Wes's Baby Sophisticate Closeup
These plastic buttons fashioned to look like woven leather really helped complete the look.

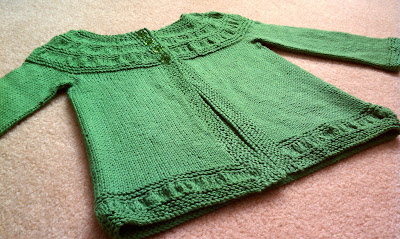
Continuing from youngest to oldest...this is Anna (2 yrs 8 mos). with my brother. She is wearing Tiny Tea Leaves
Anna in Tiny Tea Leaves
The Pattern: Tiny Tea Leaves by Melissa LaBarre Raverly Project Page
Size: 3/4 yrs
The Yarn: Knit Picks Shine Sport in Grass 4.5 skeins (495yds/452.6m)
Needle size: US 7 and 8

Started: 11/13/10
Finished: 12/20/10

Anna's Tiny Tea Leaves
I was worried about the neckline. A lot of projects on Ravelry seemed to have loose necks, which I didn't want. So for garter stitches on the yoke I used the smaller needles. It helped tightened up the neckline, so it didn't look sloppy.

Anna's Tiny Tea Leaves Closeup
The yarn was from my stash. I had started making the hexacomb cardigan with it, but didn't really like how it was turning out so I frogged it. I think it worked well for this project though.

And here is Megan (4 1/2 yrs). I started out planning to make the Lion Brand hooded raglan cardigan, but realized it required a lot of seaming. So I switched to the Duck Soup pattern eliminating the knot on the hood and replacing the garter stitch edge with a 2x2 rib.
Megan in Ribbed Duck Soup
The Pattern: Duck Soup by Anny Purls Raverly Project Page
Size: 4/5 yrs
The Yarn: Lion Bran Wool Ease Chunky in Wheat 2.25 skeins (344.3yds/314.8m)
Needle size: US 11

Started: 12/20/10
Finished: 12/23/10

Megan's Ribbed Duck Soup Closeup
I had already bought the yarn called for in the LB hooded cardi, but it is a lot heavier than what is called for in the duck soup pattern. So I followed the instructions for the 3 mo. size for the stitch counts (remember that you still need to follow the vertical height measurements for the 4/5 size).

Megan's Ribbed Duck Soup
In order to do the 2x2 edging along the button bands and hood I eliminated 9 stitches on each side. When you get to the raglan increases start the row with K1 M1 place marker M1 work 2 sts for the sleeve M1 place marker M1 following pattern instructions for the number of stitches along the back then M1 place marker M1 work 2 for the sleeve M1 place marker M1 K1.

When you're finished with the hood and body pick up stitches along the edge to create the 2x2 rib. I used a 2:3 ration. Remember to add evenly space button holes on one side of the band.

If you look at the first pic you'll notice I knit the sleeves a little too short the first time around, so I had to go back and lengthen them. Unfortunately I didn't get a new pic.

5.22.2009

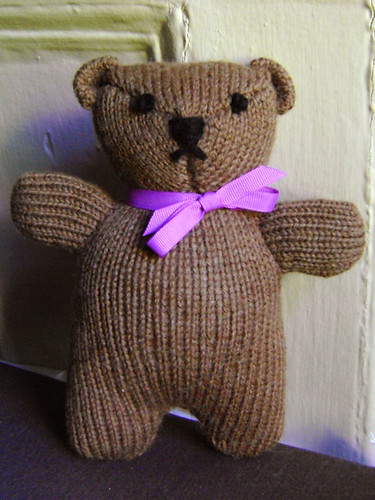
Birthday Bear

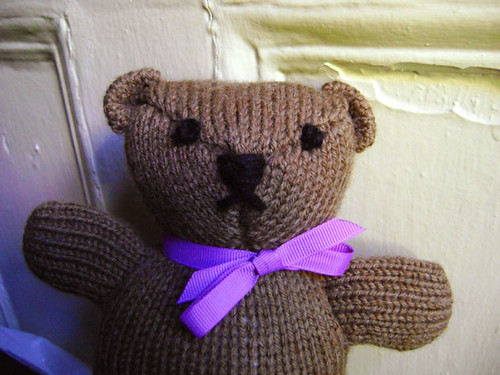
Birthday Bear

I've been waiting to blog about this since its a gift. This was intended to be a birthday gift for my youngest neice, Anna. But I was a little late on finishing it. So then I was going to send it for her baptism a couple weeks later, but since I decided go home this weekend I thought it could wait some more :)

Birthday Bear close up

The Pattern: Cashmere Teddy Bear by Erika Knight Find the Pattern on Raverly
The Yarn: Jo Sharp DK Wool in Oak 910 purchased from yarn.com
Needle size: 4

Started: April 18
Finished: May 3

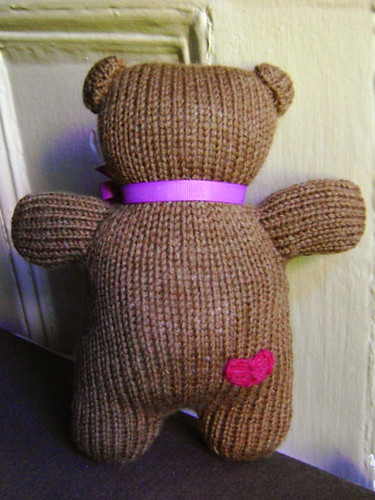
Birthday Bear backside

I pretty much followed the pattern to a T. Except for the little heart I added to the butt.

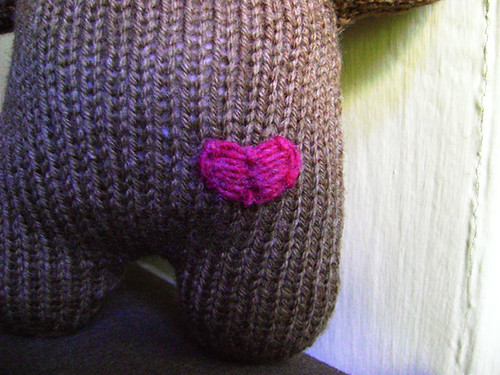
Birthday Bear backside closeup

I thought it made it a bit more special and was extra cute. I think I may have stuffed him just a wee bit too much, whoops.

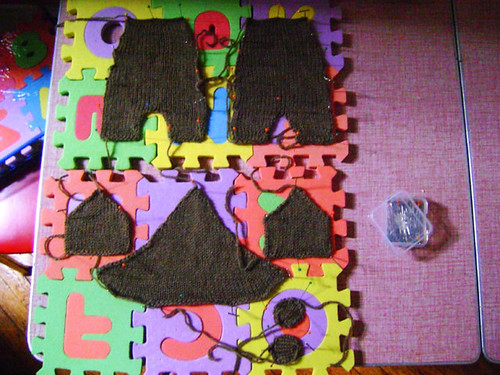
Birthday Bear peices

The bear is knit in seven peices (2 body/leg peices, 2 arms, 2 ears, and the head). There is a lot of seaming and I hate seaming. I'm just not good at hand sewing and its tedious. If I were to make this again I'd try to figure out how to modify it to combine some of the peices. I also wasn't thrilled with how the face seamed up, it doesn't look as polished as I'd like.

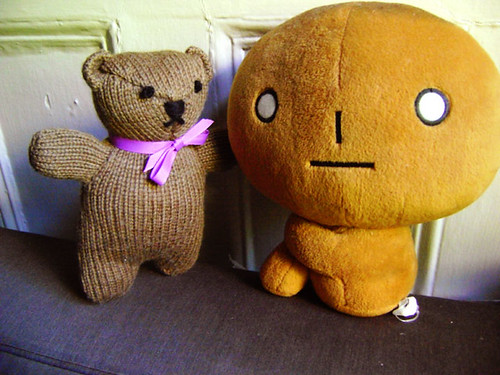
Birthday Bear and Kogepan

The plus side to this is that it is a pretty fast knit (minus the time for sewing all the peices together). And it is a great stash buster. I was able to use up a skein that had been rolling around in my knitting bag for a few months.

Overall I think he's pretty cute. My french knots and stuffing techniques could use some practice, but he's presentable.

3.30.2009

$19.99 Winders and Blocking Accessories!

Knitpicks has started selling ball winders, blocking mats, and lace blocking wires for $19.99.

Knitpicks $19.99


The reviews on Ravelry about the ball winder seem ok. Some people were having trouble with the yarn getting tangled on the base, but it seems that they weren't extending the metal arm that the yarn feeds through (I made the same mistake with my winder from JoAnn's).

Winder with arm in
This is what happens when the metal arm is folded in.

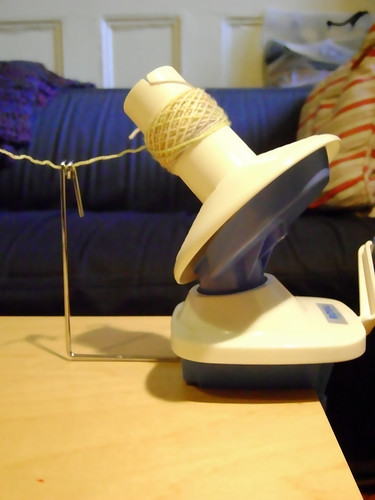
Winder with arm out
In order to get the yarn to wind properly the metal arm should be extended out like this.


If you've never used a ball winder before KP has a helpful video:


They say you have to use a swift if you are winding a hank, but I don't. I just wrap it around my knees while in a seated position.

Knee swift

Using a swift would definately be better, but if you have a tight budget (like me) knees work well.

I would love to get the blocking mats, because they are so white and pretty. But I already have somes, **sigh**.

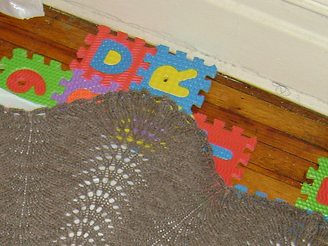
KMart ABC Foam Mats


Mine are from KMart. I got them during the holiday season for $5 a pack and they work great. I can reconfigure them to fit the project I'm blocking and break them down to store them when not in use.

I do plan to get some of those lace blocking wires. Blocking wires can make blocking lace a lot easier and creates straighter edges on your lace projects.
If you don't have 20 bucks to spend on blocking wires I read that you can use welding rods:
"Since I find this site so helpful to me with my projects, I’d like to give back and share a very money saving tip as alternatives to lace blocking wires which, if ordered from a yarn source, can cost alot of money: You need to go to your local hardware store or a welding supply store and simply tell the nice man there that you want ”welding rods for tig welding, the size of a strand of spaghetti.” They come in 3 feet lengths, I bought six of them for a little over $4.00. More money for yarn :) They are stainless steel, make sure they are uncoated (I guess some of them come coated with something). Honestly, there’s no excuse for not wire blocking with a deal like that!!! Have fun, enjoy. If you are already familiar with blocking wires, they work every bit as nice as those “expensive” ones. :)"

-prairiesu on Ravelry


I'm a little too intimidated by the thought of picking out welding rods. So I'm gonna spend the extra bucks and get KP wires.

Warning! The following pics don't have anything to do with winders, blocking accessories, knitpicks or knitting. They're of my baby niece, so if you don't like babies stop scrolling!

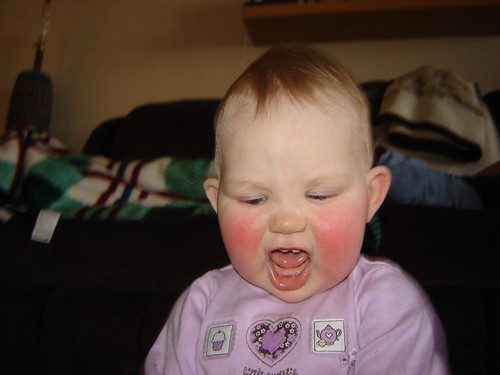
Anna with Teeth

But how could you not like babies? Especially one as cute as this!

Anna with Teeth

Hahahaha, what an expression!