


7.17.2009




7.15.2009
Mustardy Darcy
Well here is what I think I did.

The Yarn: Knit Picks City Tweed Heavy Worsted in Lemon Curd
just a little over 4 skeins
Needle size: 9
Started: 6/13
Finished: 6/21
On WS: K2, k2tog (last stich of the garter with one stitch from the back panel).
On RS: slip one st from the back panel onto the left needle wyib. K2tog, k2
continue until all of the back panel sts are used.
Then using a kitchener stitch connect with the right panel garter detail.

The Yarn: Knit Picks City Tweed Heavy Worsted in Lemon Curd
just a little over 4 skeins
Needle size: 9
Started: 6/13
Finished: 6/21


On WS: K2, k2tog (last stich of the garter with one stitch from the back panel).
On RS: slip one st from the back panel onto the left needle wyib. K2tog, k2
continue until all of the back panel sts are used.
Then using a kitchener stitch connect with the right panel garter detail.


7.02.2009
Lightside Cowl

The Yarn: Sundara Aran Silky Merino in Tulip about 2/3 of a skein
Needle size: 7
Started: 6/13
Finished: 6/28


Until then have a great 4th of July!
6.23.2009
Yarn Makeover
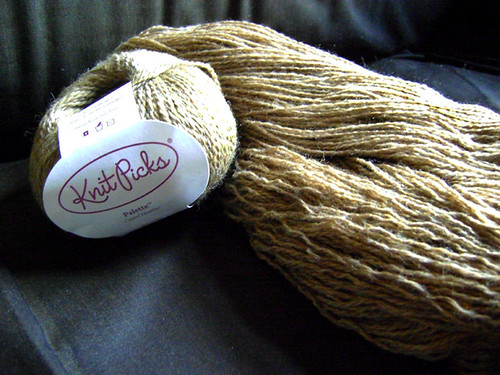
Twice now I've bought camel colored yarn only to discover that I don't really like the color. So instead of leaving it in my stash to collect dust I decided to have a go at Kool Aid dyeing.
There are a lot of how-to's out there for dyeing yarn with Kool Aid. I chose to use the instructions from thepiper.com. She has a color chart to help you choose which flavor to use. And it shows both white and natural tan color (very similar to the camel I was starting out with).
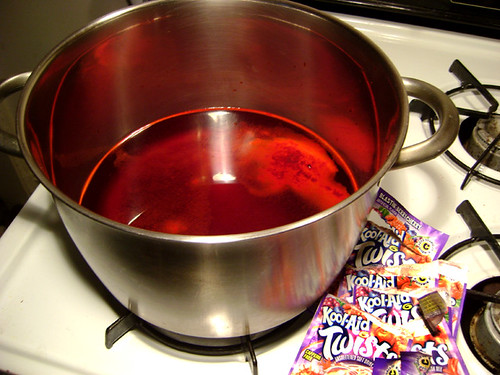
I used the Blasts Berry Cherry flavor. It was the only Kool Aid that wasn't presweetened that I could find. Luckily I wanted red :) Of course you don't have to use Kool Aid brand, you're free to use any brand of drink mix. Just make sure you get the unsweetened kind, you don't want sticky yarn. From what I saw in the store the stuff in tubs all has some sort of sweetner, so look for the packets.
There are other recipes that don't use vinegar. But I was afraid that if I didn't use the vinegar to set the dye that it would bleed.
The heat helps the fibers to open up and suck in all the dye.
It takes a while for the water to cool down. But don't try to rinse your yarn in cold water to get it cooled down, it'll cause it to felt.
There are a lot of how-to's out there for dyeing yarn with Kool Aid. I chose to use the instructions from thepiper.com. She has a color chart to help you choose which flavor to use. And it shows both white and natural tan color (very similar to the camel I was starting out with).
I used the Blasts Berry Cherry flavor. It was the only Kool Aid that wasn't presweetened that I could find. Luckily I wanted red :) Of course you don't have to use Kool Aid brand, you're free to use any brand of drink mix. Just make sure you get the unsweetened kind, you don't want sticky yarn. From what I saw in the store the stuff in tubs all has some sort of sweetner, so look for the packets.
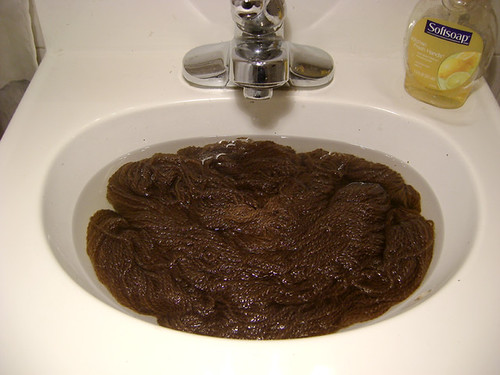
There are other recipes that don't use vinegar. But I was afraid that if I didn't use the vinegar to set the dye that it would bleed.
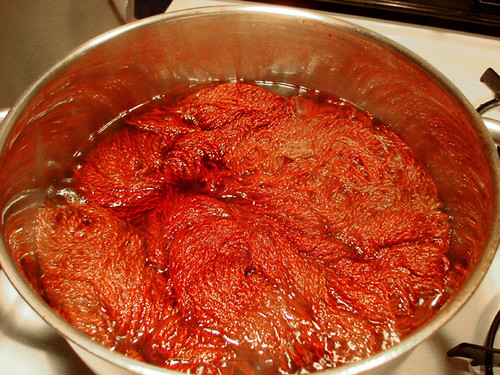
The heat helps the fibers to open up and suck in all the dye.
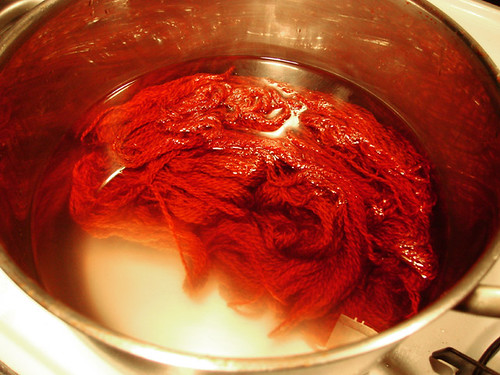
It takes a while for the water to cool down. But don't try to rinse your yarn in cold water to get it cooled down, it'll cause it to felt.


6.17.2009
Towering Inga
My first Ugh!
The Yarn: Main Color Ella Rae Classic in White 01
Contrast Color 1 Jo Sharp Classic DK Wool in Maple 911
Contrast Color 2 Cascade 220 in Teal 9420
Needle size: 3 and 5
Started: 3/7
Finished: 6/14
I did have a little trouble managing the 3 colors. It is much easier when you only have to worry about 2 colors.
It was fun to watch the braided edge come together. However, there is a lot of twisting of the yarn. Don't worry though. the first half of the braid twists in one direction and the second half twist in the opposite direction. So if you just let it keep twisting it'll eventually work itself out.
If you're having trouble understanding the pattern instructions for the knitted braid here's a good link to help you out: Siskyou Knits
·The color combination. I really like the teal and maple combo, I think it looks really delicious and they really pop against the white background.
·The diamond design, I like the intricate look.
·The braided edge. Cool technique and I like how it turned out.
The ONE thing I HATE about how Inga is her size. She's ridiculously tall!
I plan to go back and fix her. Eliminating half a a diamond should bring it down to the right height, but for now I'm shelving Inga. In the back of my closet. So I don't have to look at her. Because I'm frustrated.

The Yarn: Main Color Ella Rae Classic in White 01
Contrast Color 1 Jo Sharp Classic DK Wool in Maple 911
Contrast Color 2 Cascade 220 in Teal 9420
Needle size: 3 and 5
Started: 3/7
Finished: 6/14
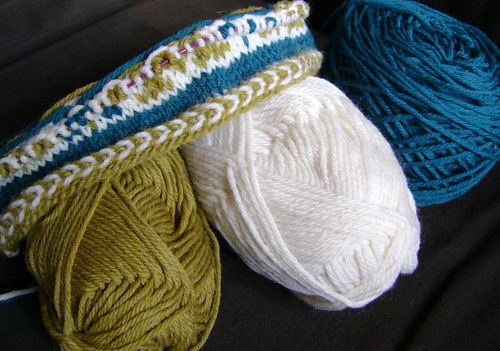
I did have a little trouble managing the 3 colors. It is much easier when you only have to worry about 2 colors.
It was fun to watch the braided edge come together. However, there is a lot of twisting of the yarn. Don't worry though. the first half of the braid twists in one direction and the second half twist in the opposite direction. So if you just let it keep twisting it'll eventually work itself out.
If you're having trouble understanding the pattern instructions for the knitted braid here's a good link to help you out: Siskyou Knits


·The color combination. I really like the teal and maple combo, I think it looks really delicious and they really pop against the white background.
·The diamond design, I like the intricate look.
·The braided edge. Cool technique and I like how it turned out.
The ONE thing I HATE about how Inga is her size. She's ridiculously tall!

I plan to go back and fix her. Eliminating half a a diamond should bring it down to the right height, but for now I'm shelving Inga. In the back of my closet. So I don't have to look at her. Because I'm frustrated.
Subscribe to:
Posts (Atom)


