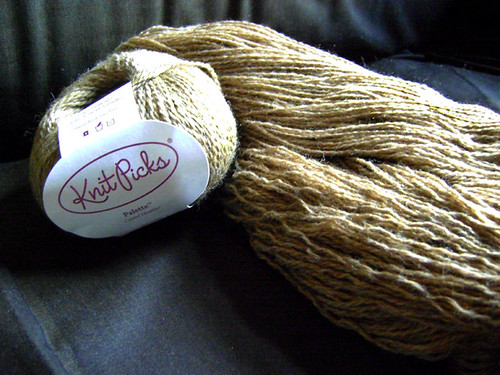
Twice now I've bought camel colored yarn only to discover that I don't really like the color. So instead of leaving it in my stash to collect dust I decided to have a go at Kool Aid dyeing.
There are a lot of how-to's out there for dyeing yarn with Kool Aid. I chose to use the instructions from thepiper.com. She has a color chart to help you choose which flavor to use. And it shows both white and natural tan color (very similar to the camel I was starting out with).
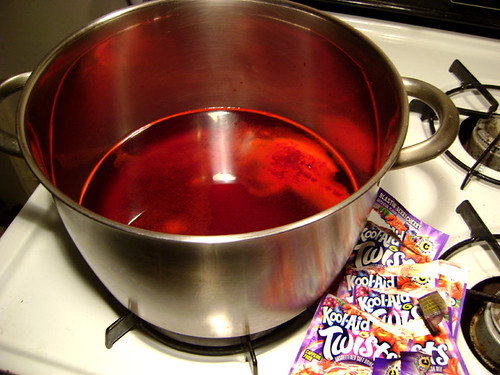
I used the Blasts Berry Cherry flavor. It was the only Kool Aid that wasn't presweetened that I could find. Luckily I wanted red :) Of course you don't have to use Kool Aid brand, you're free to use any brand of drink mix. Just make sure you get the unsweetened kind, you don't want sticky yarn. From what I saw in the store the stuff in tubs all has some sort of sweetner, so look for the packets.
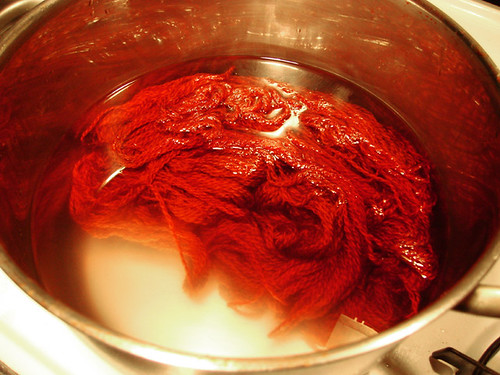
First I wrapped the yarn into loose skeins rather than balls so that it would dye evenly.
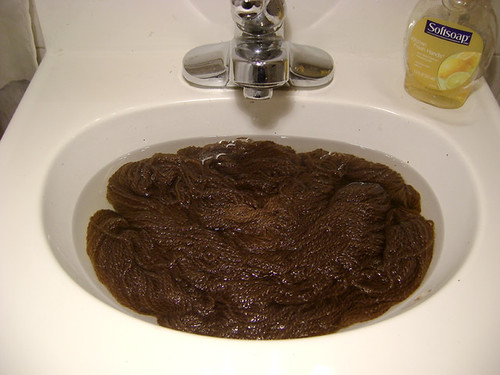
Then I had to soak the yarn for 20 minutes in hot water.
While my yarn was soaking I prepared the Kool Aid dye. The instructions call for 1pkg of Kool Aid per 8oz of liquid (6oz water, 2oz vinegar) for each oz of fiber. I had 3 balls equaling a total of 5.25oz. I decided to use 7 packets of Kool Aid, because I wanted the red to really cover up the camel color.
There are other recipes that don't use vinegar. But I was afraid that if I didn't use the vinegar to set the dye that it would bleed.
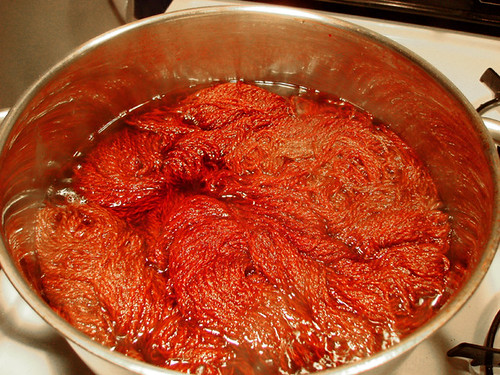
Next step calls for removing the excess soak water from the yarn and placing it in the dye mixture. The liquid should cover your yarn. If not add more water. Then you let it simmer for 45 minutes.
The heat helps the fibers to open up and suck in all the dye.
After its done cookin the water should be clear of dye - either clear or milky white. When I turned of the heat, my water still had a slight pinkish tint. But it cleared up as the yarn cooled down.
It takes a while for the water to cool down. But don't try to rinse your yarn in cold water to get it cooled down, it'll cause it to felt.
When it was cool enough to handle I wrung it out and then hung it in the bath tub to dry.
Voila! Yarn make over complete!
6.23.2009
6.17.2009
Towering Inga
My first Ugh!
The Pattern: The Inga Hat by Sheila Macdonald 
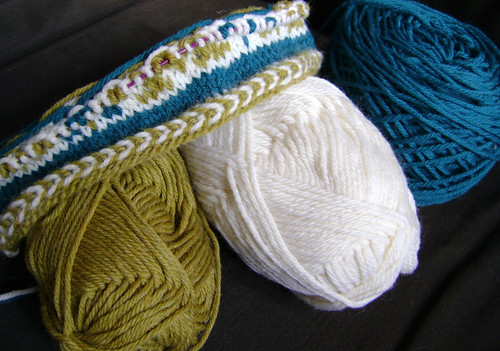
The Yarn: Main Color Ella Rae Classic in White 01
Contrast Color 1 Jo Sharp Classic DK Wool in Maple 911
Contrast Color 2 Cascade 220 in Teal 9420
Needle size: 3 and 5
Started: 3/7
Finished: 6/14
This is my second colorwork project and my first try with more than 2.
I did have a little trouble managing the 3 colors. It is much easier when you only have to worry about 2 colors.
It was fun to watch the braided edge come together. However, there is a lot of twisting of the yarn. Don't worry though. the first half of the braid twists in one direction and the second half twist in the opposite direction. So if you just let it keep twisting it'll eventually work itself out.
If you're having trouble understanding the pattern instructions for the knitted braid here's a good link to help you out: Siskyou Knits
I changed the chart up a bit, because I wanted to bring more of the second contrasting color into the pattern. So I used the second contrasting color for the centers of the diamonds and the lines inbetween. I recolored the chart so that I'd remember to use the correct color. The colors wouldn't have meshed as well if I didn't bring more of the teal in.Things I love about Inga:
·The color combination. I really like the teal and maple combo, I think it looks really delicious and they really pop against the white background.
·The diamond design, I like the intricate look.
·The braided edge. Cool technique and I like how it turned out.
The ONE thing I HATE about how Inga is her size. She's ridiculously tall!
This is clearly my fault, because everyone else's Inga's seem to be the right height. Yet mine towers above. I suspect I should have paid more attention to the height of my gauge. I do confess, I didn't swatch for this.
I plan to go back and fix her. Eliminating half a a diamond should bring it down to the right height, but for now I'm shelving Inga. In the back of my closet. So I don't have to look at her. Because I'm frustrated.
Labels:
colorwork,
finished object,
knitting,
Project Spectrum,
PS4,
Ugh
6.12.2009
fabric.com
I'm not a quilter. Not by choice. My shoebox sized apartment doesn't have room for a sewing machine and such. But I love the quilts I've seen on Crazy Mom Quilts, yaiAnn, and Flint Knits.
My interest in quilting and bookbinding has led me to peruse fabric stores and sites. So when I saw How About Orange's $5 off fabric.com post I had to check it out.
And they have this awesome design wall feature. Simply clicking the 'add to design wall' button adds the fabric image to a separate page where your can drag it about. This allows you to arrange the images to see if you like the mix of patterns and colors.
Totally awesome dude.
What a great planning tool. I wish that yarn sites had this. Wouldn't it be great to be able to see the each yarn image side by side? I've actually pulled pictures off yarn sites and arranged them in photoshop to do this, but it would be so much simpler if you were able to actually do this on the site.
Check it fabric.com
Get a $5 off coupon code at How About Orange
6.11.2009
Sounds of Spring Part 2
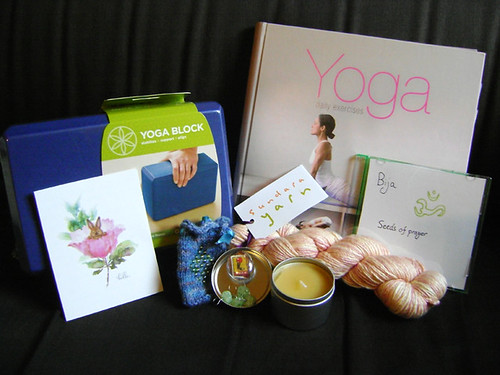
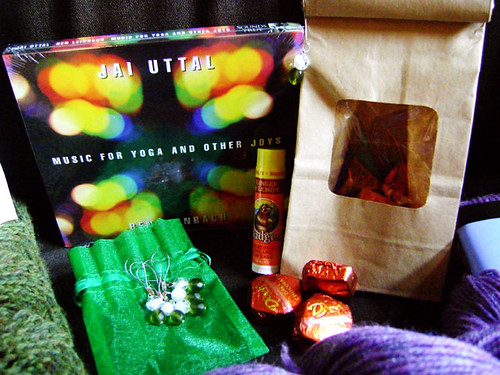
So this is what I received from craftywillow:
Yoga Daily Exercises book - has some really great photos
Yoga block - wanted one of these for a while
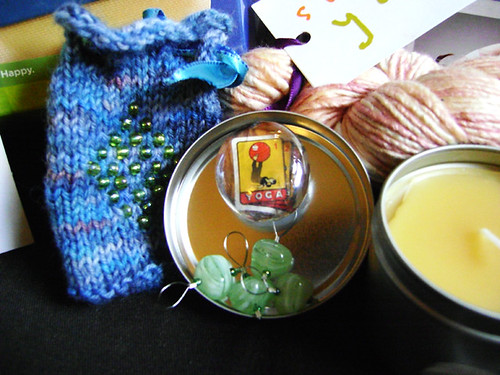
Stitch markers
Homemade beeswax candle
Knitted beaded bag - perfect for my iPod shuffle
Bija Seeds of Prayer CD
Magnet with yoga pose :)
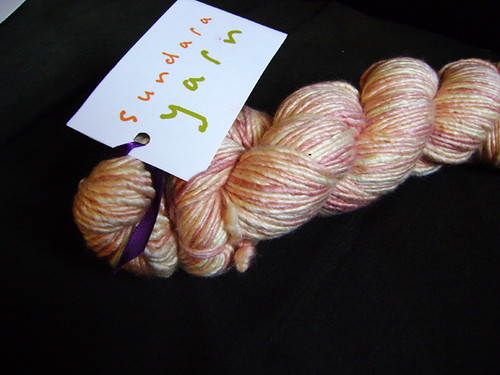
And Sundara silky merino yarn in tulip - I’ve wanted some of this for a long time :)
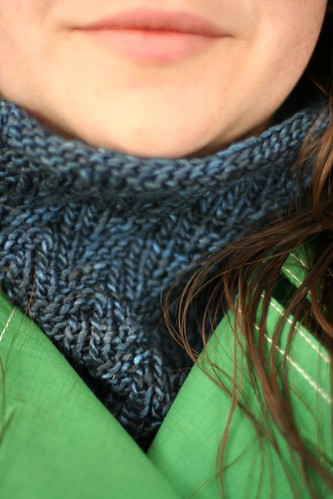
Close-up of some of the detailsI'm really excited about the sundara yarn I think I'll make one of these with it:Sarah Fama's Dark Side Cowl
Thanks craftywillow!
6.08.2009
Mossy Shetland Triangle
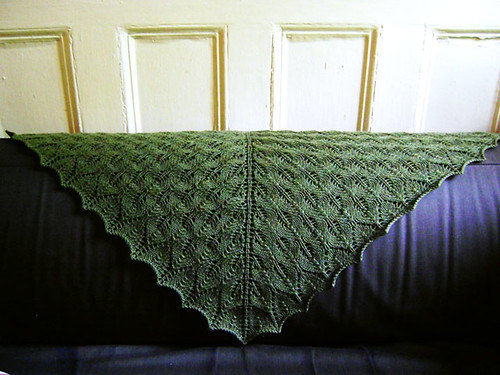
I know, I know. Everyone under the sun and then some has knit one of these. But how can you resist? It is such a great pattern. And really easy. The Pattern: Shetland Triangle by Evelyn A. Clark
The Yarn: Knit Picks Palette in Verdant Heather and Clover held double stranded. Somewhere between 1 ¼ - 1 ½ balls of each color.
Needle size: 4
Started: 5/20
Finished: 5/26
The pattern starts at the top in the middle and works outward (is that a word?). Like this:
You start by chaining four in the middle, ch4. And then working around three sides of the chain you start increasing every other row.
I have to admit that I stared at the ch4 instruction for the longest time trying to figure out just what the hell it meant. 'Am I suppose to go to chapter 4?', 'Am I missing chart 4?'. Eventually I came to my senses and realized it is the crochet abbreviation for chain 4 loops. duh.
After that I still didn't really know what the hell was going on. I'm a really visual person so reading the cast on instructions for something I'd never done or seen before had me stumped. Eventually I just stopped trying to wrap my brain around it and just did it. Exactly as instructed and it worked out perfectly. So if your brain malfunctions like mine, just stop thinking so hard and follow the instructions a step at a time. It'll work out. I promise. I think.
After casting on it is a cake walk. You just repeat the main chart like 9 times.
And it is really easy to expand the pattern if you find that the finished size isn't to your liking. I actually did one repeat more of the main chart than called for. When you do the edging you just have to repeat the center area of each side an extra time.
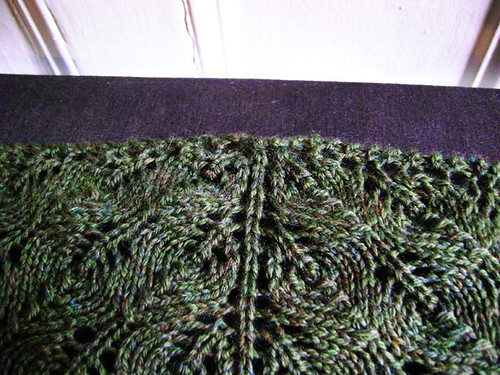
Blocking this sucker is essential. If you don't you'll just have a bumpy blob like this:
Doesn't show off the lace pattern quite as nicely, huh?
If you want a nice straight edge at the top I recommend you get some lace blocking wires.
You don't have to use them on all sides, but it'll make the top edge straight as an arrow.
I really loved how this turned out. I'm only sad that I couldn't keep it. At least I know craftywillow loves it :)
The Yarn: Knit Picks Palette in Verdant Heather and Clover held double stranded. Somewhere between 1 ¼ - 1 ½ balls of each color.
Needle size: 4
Started: 5/20
Finished: 5/26
The pattern starts at the top in the middle and works outward (is that a word?). Like this:
You start by chaining four in the middle, ch4. And then working around three sides of the chain you start increasing every other row.
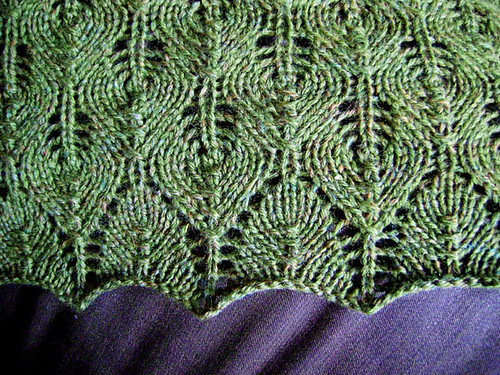
I have to admit that I stared at the ch4 instruction for the longest time trying to figure out just what the hell it meant. 'Am I suppose to go to chapter 4?', 'Am I missing chart 4?'. Eventually I came to my senses and realized it is the crochet abbreviation for chain 4 loops. duh.
After that I still didn't really know what the hell was going on. I'm a really visual person so reading the cast on instructions for something I'd never done or seen before had me stumped. Eventually I just stopped trying to wrap my brain around it and just did it. Exactly as instructed and it worked out perfectly. So if your brain malfunctions like mine, just stop thinking so hard and follow the instructions a step at a time. It'll work out. I promise. I think.
After casting on it is a cake walk. You just repeat the main chart like 9 times.
And it is really easy to expand the pattern if you find that the finished size isn't to your liking. I actually did one repeat more of the main chart than called for. When you do the edging you just have to repeat the center area of each side an extra time.
Blocking this sucker is essential. If you don't you'll just have a bumpy blob like this:
Doesn't show off the lace pattern quite as nicely, huh?
If you want a nice straight edge at the top I recommend you get some lace blocking wires.
You don't have to use them on all sides, but it'll make the top edge straight as an arrow.
I really loved how this turned out. I'm only sad that I couldn't keep it. At least I know craftywillow loves it :)
I was really touched by this. I don’t think anyone’s ever knit me anything! The photo doesn’t do it justice. I can’t believe you knit a whole shawl, Marn…it would take me forever, I’m such a slow knitter! It’s the most beautiful shade of green. Thank you so so much!Hmm... I hope she doesn't mind me quoting her here-craftywillow
6.05.2009
Sounds of Spring Part 1
Another swap package completed. Same group but slightly different swap than last time. And a different partner: craftywillow.
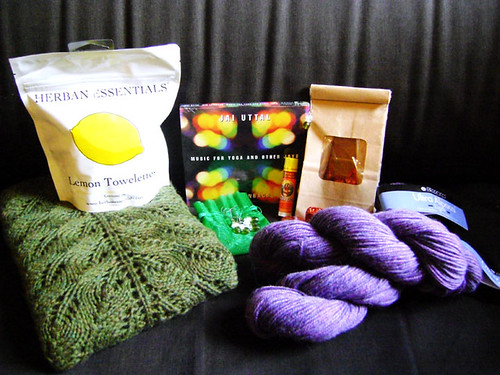
On the questionnaire craftywillow said that for spring colors she likes dark greens and bright yellows. Hehe I said the same thing! She also said she likes lilac and hyacinth colors.
I knit her a Shetland Triangle in dark green. I chose this pattern because it was in her queue and it is something I've been wanting to make for awhile now. I'll post details about this project later.
The yarn is Berroco Ultra Aplpaca Light in a lilacy colorway.
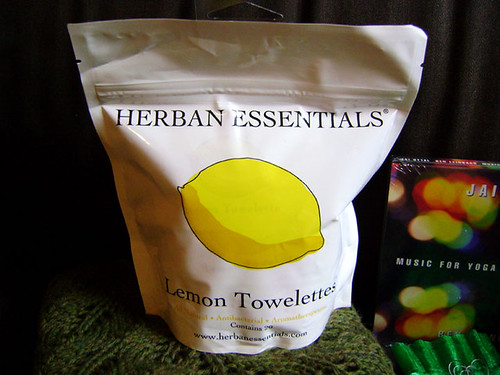
I found these lemon scented wipes for yoga mats, feet, etc. They smell soooo good! And it got me thinking that if I include lemon scented/flavored items they could represent bright yellow, one of her color preferences. So I also put in ginger lemon flavored badger lip balm.
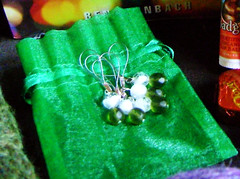
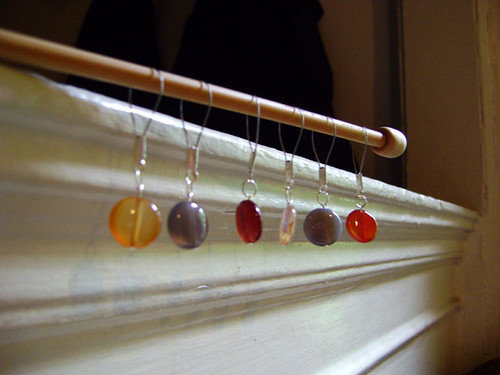
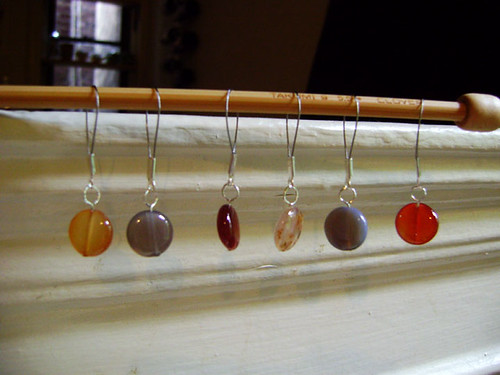
I also made these stitch markers. This is the third set that I made last weekend.
I made these the same way I made the first set. Almost exactly as CJ instructed, but without the wrapped loop.
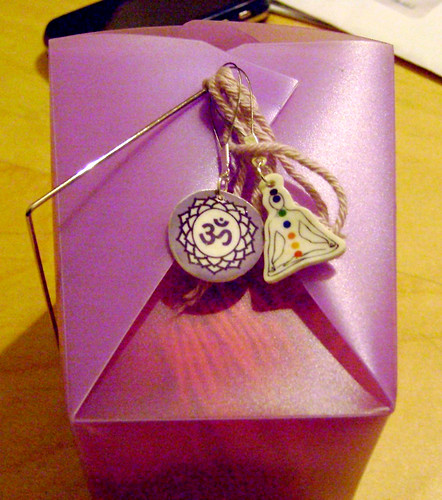
There is a wild card item from each swap. Last time the wild card was something with a sanskrit symbol. I sent 3littlebirds a stitch marker with the OM symbol. This time the wild card was music. Get it, SOUNDS of spring?
I chose to send some yoga tunes: Music for Yoga and Other Joys. Sounded good in the store, I think I'll have to get my own copy.
Craftywillow I hope you enjoy your package!
Remember details on my Shetland Triangle coming soon...
6.02.2009
A second try at stitch markers
This is my second go at making stitch markers.
Above is the first set of stitch markers I ever made.
They were for my Winter Solstice Yoga Swap partner. I only made two, because the darn shrinky dinks kept warping. I wanted circles, but they wanted to be ovals. So after wasting 5 out of 6 sheets of shrinky dinks I finally gave up. I took the two best looking and gave them to my partner. Sumthin is better than nuthin right?
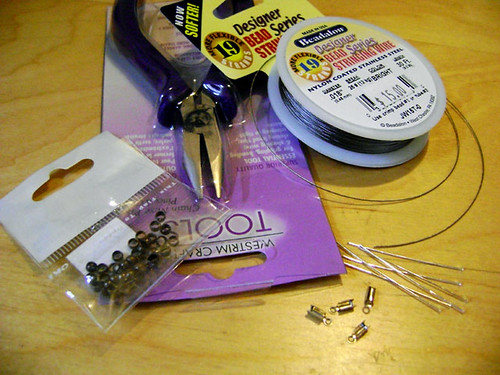
Over the weekend I tried again. This time I decided to ditch the shrinky dinks and just use beads. Using the instructions from CJ's Knitting Basket as a guideline I made three sets.
The first set was made almost exactly as the instructions instructed (?¿?). The only difference is that I didn't make a wrapped loop, I just don't like them (or I'm lazy). Instead I made a circle and cut the excess.
I used chain nose pliers to make the loops. They didn't turn out as well as they would have with round nose pliers, so I'm definately going to invest in some of those. Round nose pliers also would have made it a lot quicker too. With the chain nose pliers I had to make a lot of little bends the get a circular shape.
The second set I made with these fun skull beads. This is a combination of wood, plastic, and stone beads. I stumbled upon them in the store and thought they'd be really cute mixed together like this.
Instead of using a head pin for these I just made one loop out of the bead wire. Then I clamped below and above each bead with a crimping bead (see the dark colored rings in the supplies picture). Once again (because I'm a cheapskate) I didn't have the right tool and used my chain nosed pliers instead, so the crimping beads are squished flat.
The third set is a gift and will be revealed later this weekend...
I got all my supplies at Bead World
1384 Broadway
btw. 37th & 38th St.
New York, NY 10018
212.302.1199
Hours
Mon - Fri 9:00am - 7:00pm
Sat & Sun 10:00am - 5:30pm
Subscribe to:
Posts (Atom)